watermark pictures
- 最后更新时间: 2016-08-02 10:11:04
- / 创建时间: 2016-08-02 08:43:52
On this page
一、使用系统自带的水印功能
1、后台上传图片功能自带了打水印功能(水印在图片的右下角),Enable modeCreate a new subfolder watermark under the images folder, upload a png watermark file with transparent background to the watermark folder, and rename it watermark.png, that is, the automatic watermarking function is enabled. (Watermark image size: long strip, such as 157px * 27px, can be adjusted to satisfaction after use, repeat the above steps,上传新水印注意点:重要,需要先删除原先的watermark.png文件,不然新的水印图片会被打上水印,也不能是直接上传watermark.png,不然会自己给自己打上水印。),效果图就是如下图那样右下角水印。2. Disable the watermarking function of the systemRemove the images/watermark/watermark.png file.
小技巧:有人说,我当前要传的这张图片不想打水印怎么办,把watermark.png先改名,上传完不想打水印的图片之后,再改回watermark.png。
Second, use Meitu Xiu Xiu to watermark the picture
1、首先我们先建立水印图片
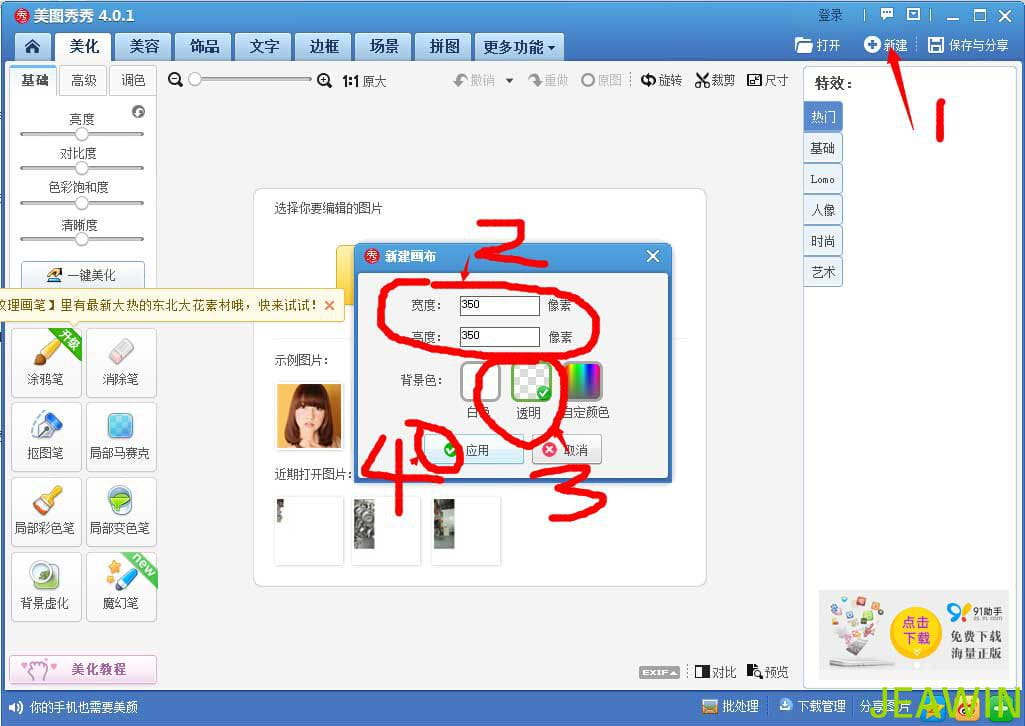
打开“美图秀秀”,进到欢迎界面,点选美化图片,右上角【新建】,宽度和高度可以根据你们要打水印的图片的宽高决定,
这边我要示范的是350px * 350px,背景色选择“透明”的选项
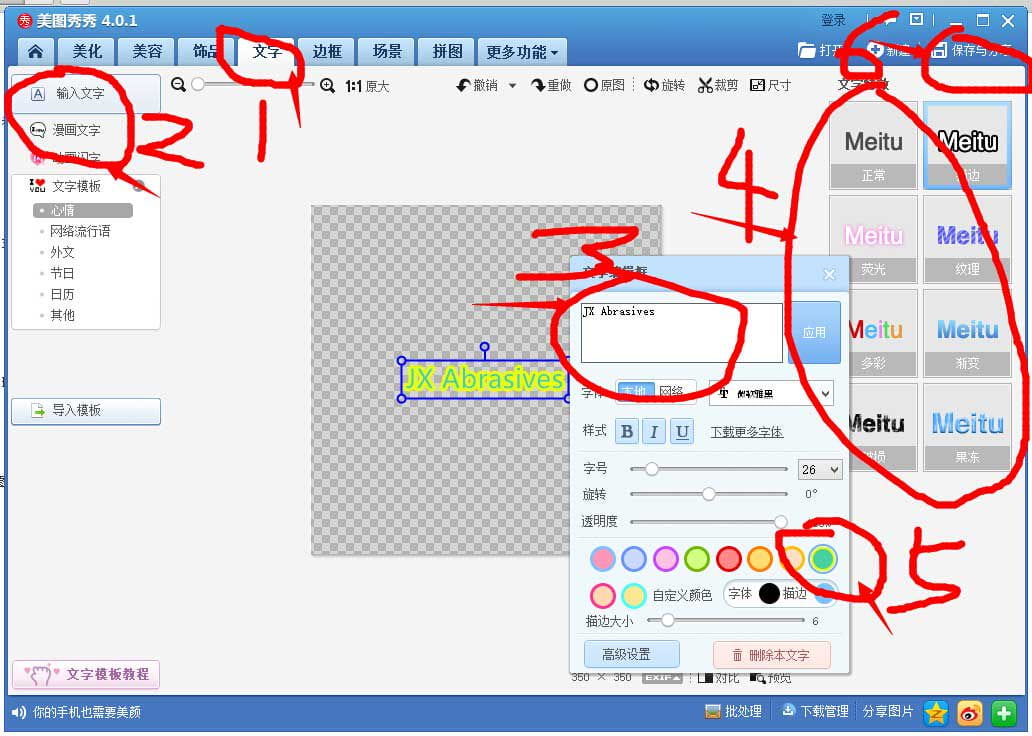
现在打上图片的文字,点击文字输入JX Abrasives,可以设置文字字体,样式
保存水印图片
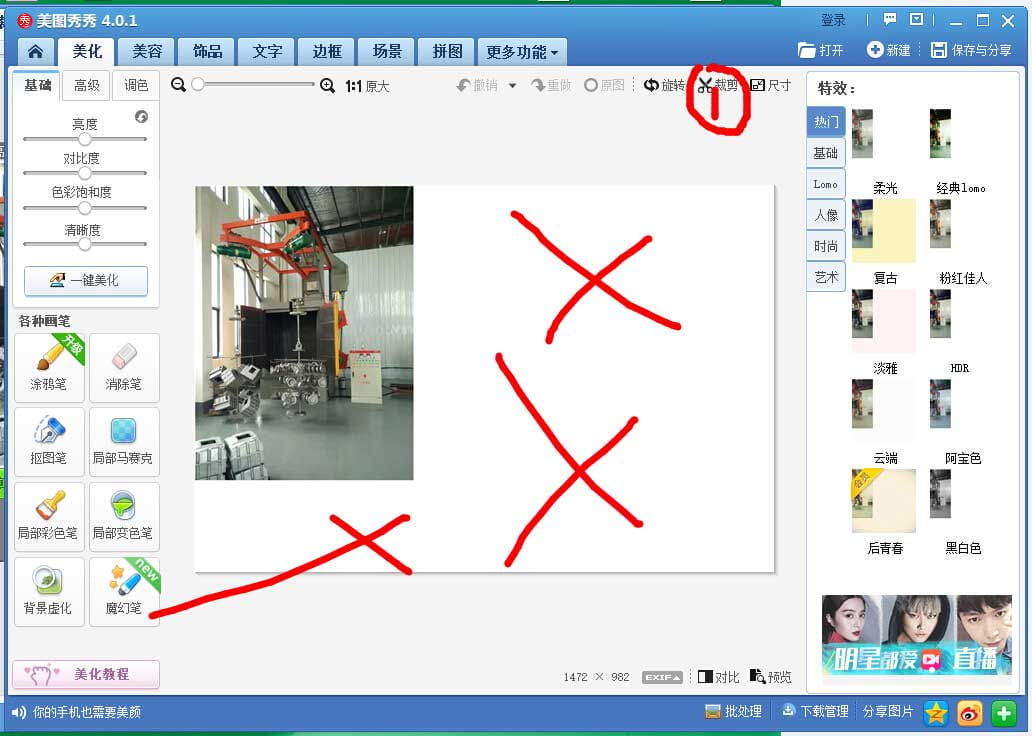
2. Open the picture we want to watermark
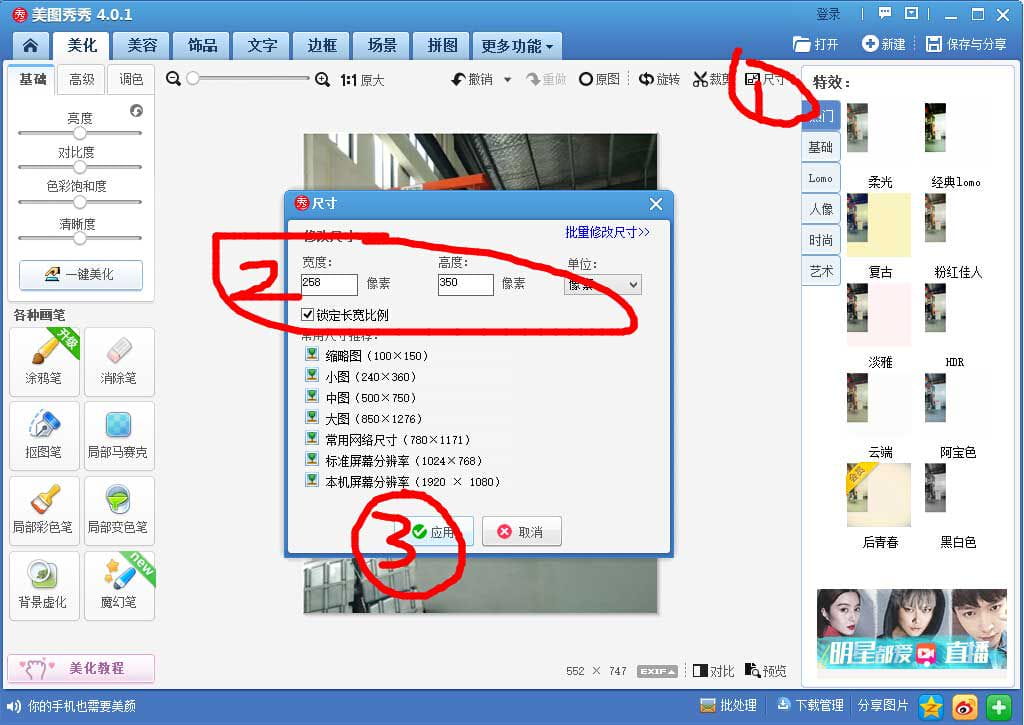
The upper right corner "opens" the picture, because the picture size of my example is not compliant, so we must first process it as compliant
我们先要裁切下,把空白的地方去除。
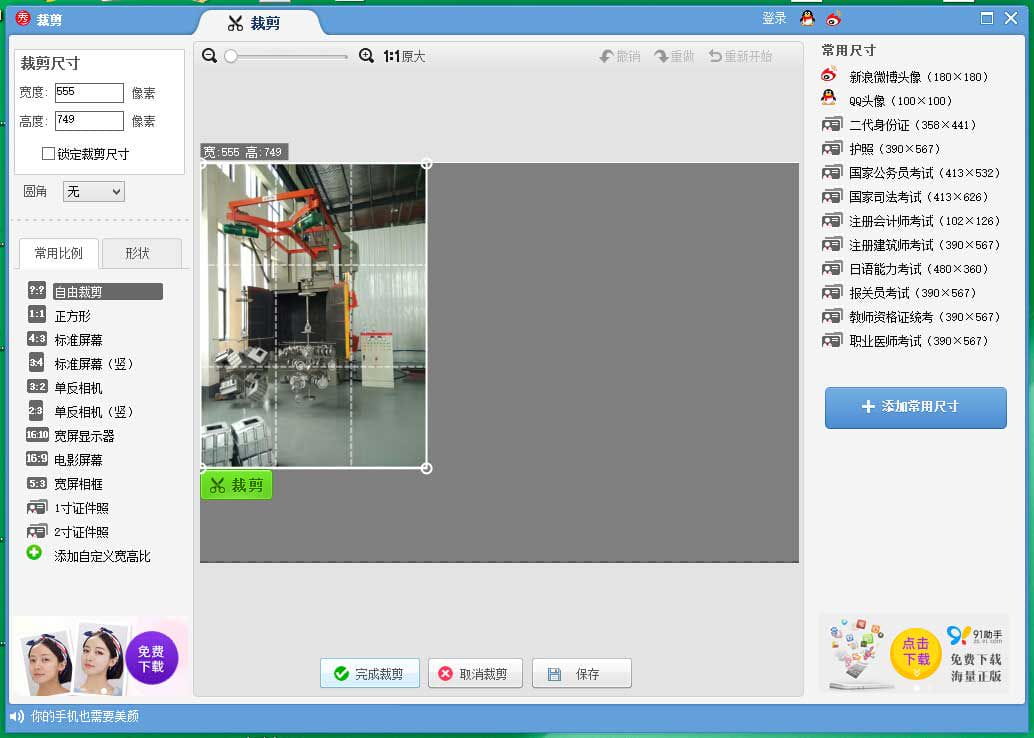
然后修改尺寸,因为我们是350*350,所以这边的 557 * 749,改高就可以了,宽度让它自动变化
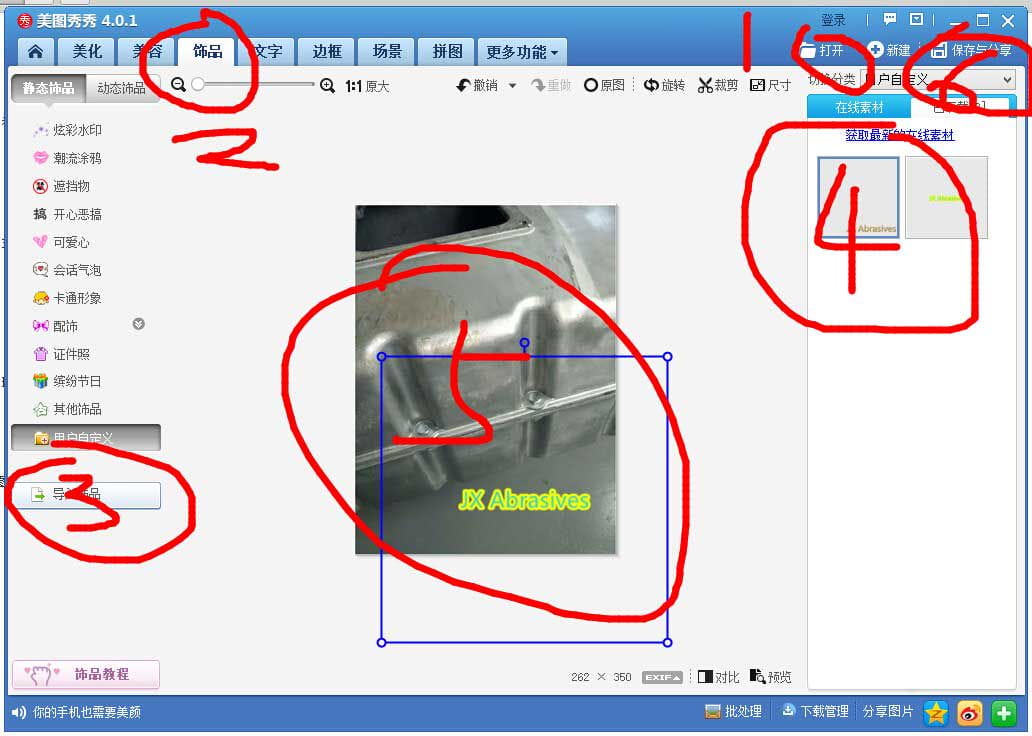
我们现在要给他打水印了。【导入饰品】 导入我们刚才第一步做好的水印图片
Drag to the right, put it in the right place, and save it
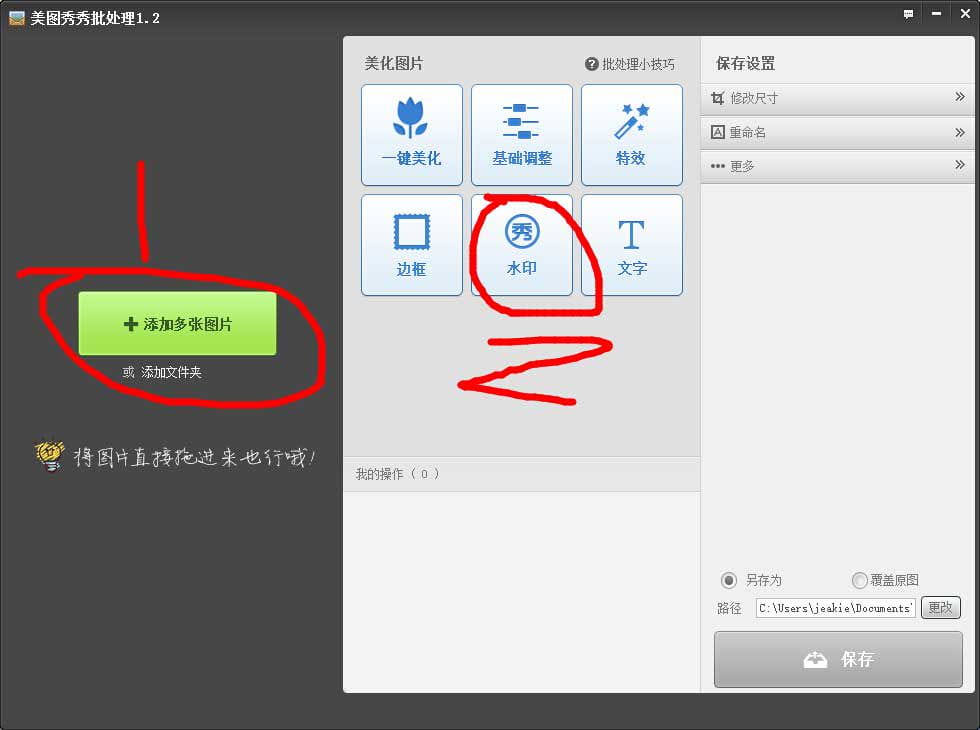
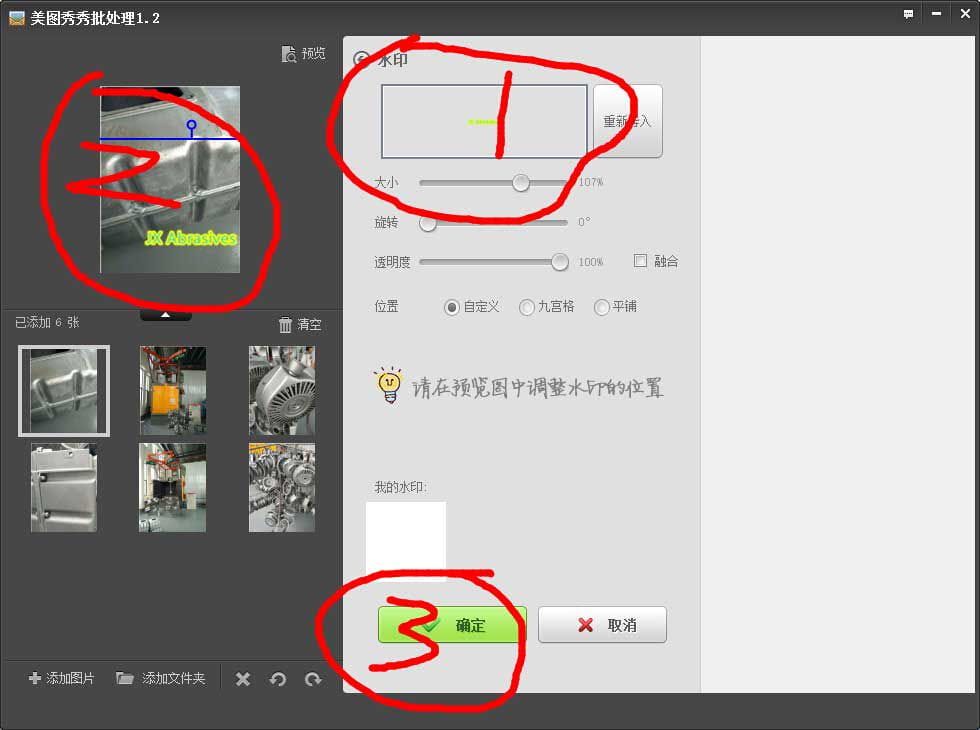
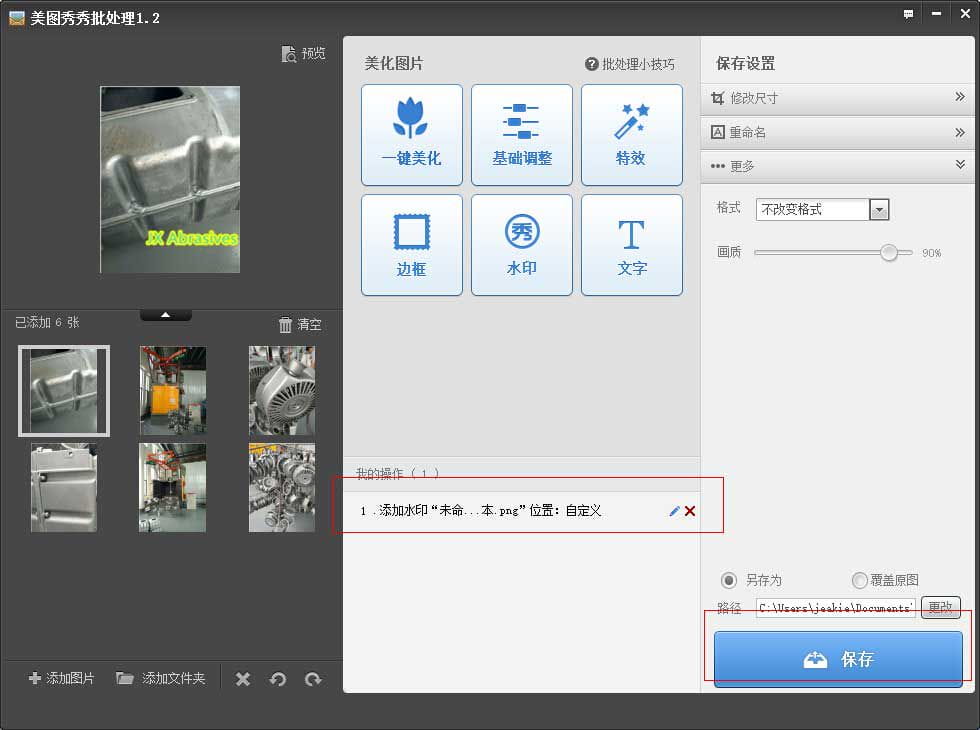
3. Watermark in batches
右下角的【批处理】,首先批处理的图片规格是一样的才比较好,
服务导航
成功案例
Contact Us
Rm 2607, No.879 Xiahe Road, Xiamen, Fujian, China.
Tel: +86-592-2203787
Mobile: +86-13276021100
QQ/Wechat: 215168
Email: jeasin@jeasin.com
Copyright © 2011 - 2024 Jeawin Internet Technology Co., Ltd. All Right Reserved.
闽ICP备11028244号-2 | XML | 隐私政策 | 服务条款 | 站点地图